Showing posts with label Handmade Soap. Show all posts

December 7, 2012

DIY Deodorant, etc.

Homemade bar soap for guests and gifting


I had to replenish our supply of deodorant today. Yes, I said I made deodorant. I make deodorant, lip balm, face lotion, hand soap (recipes and tutorials are here), shampoo bar, and laundry soap. The laundry soap lasts about a year and probably costs under $5 to make. Though I'll make hand bar and shampoo bar soap about once a year, it really lasts us longer than that. It's just that I give it away. I've not bought shampoo or bar soap in twenty years!

Soap bars and my face lotion
We tried getting away from antiperspirants years ago . . . and didn't like the by-product (or should I say "the lack thereof of the product"). Why is there no problem now? Or to rephrase, why do we not smell (stink!) now? We've eaten pretty good most of our married life. Tho now we're eating even better! What I read, is to give it time - time for the body to adjust. So we did. And we like it! It's got to be healthier.

Ingredients for homemade deodorant - the spoon is holding the solidified mixture


I do two kinds of recipes depending on the time of year. Our favorite is this simple one -

BASIC DEODORANT
1/4 cup coconut oil
3 Tb shea butter
1/4 cup baking soda
3 Tb arrowroot powder
(I'm now adding probiotic capsules and lavender essential oil drops as in recipe below)

I melt the fats in the microwave and then stir in the dry ingredients. Pour into the desired containers. I usually put in small canning jars. But when traveling I prefer these plastic tubs.

BUT when it's summer? This mixture can get meltedy in the heat, just sitting in the closet or bathroom! That's when I've done deodorant in roll-up containers (I'll still use this year round since I've got it). It could also be made into a "deodorant bar" by pouring the ingredients into small containers like silicone baking shapes. It's the same basic ingredients as above with added beeswax.

MORE SOLID DEODORANT
1/2 cup coconut oil
1/2 cup shea butter, cocoa butter, or mango butter (or mixture of these)
1/2 cup beeswax pieces (finely grated or bought as small pieces/pearls)
1/4 cup baking soda
1/2 cup arrowroot powder
Optional ingredients I add -
1 tsp vitamin E oil
2-3 capsules of probiotics
20 drops essential oil, I like lavender
(1st sample essential oil on your skin to make sure it doesn't burn, etc)

Homemade deodorant and lip balm
We don't like scents so rarely use in any of my soaps. When using beeswax, like I also add to my face lotion, it takes a longer time to melt. I've started using things and realize there's beeswax pieces, so will remelt it all. As you can see in the picture, there are roll-up tubes for purchase. Or you can save your empties and reuse - just make sure it's rolled back down. Or look for containers here as well as ingredients.

In the picture you also see my lip balm. Those tubes are sold at the same site as the deodorant tubes. I also ordered from them a tray that holds 50 of these tubes - which does help in holding for filling these little tubes. Just pour the melted ingredients and scrape along the top to fill.

My friend and me tried adding powdered alkanet to some of the tubes. Fill your plain ones first and then carefully do the colored ones so it doesn't mess up all of the plain ones!

Lip balm tray that holds 50 tubes


I go for ingredients that don't melt easy - Monte complains about those in his pockets.

LIP BALM
This is a recipe to get you started. Remember that you can be creative and alternate oils and butters to formulate your favorite recipe. If putting in little lip balm tins you could lessen the beeswax if you want.

1 1/2 oz beeswax (grated or pieces/pearls)
1 1/2 oz shea or mango butter (I use mango cuz it's a bit harder)
1 1/2 oz cocoa butter (tastes like chocolate!)
3 oz castor oil or grapeseed (I use castor)

Melt all ingredients in a microwave-safe container or double boiler (preferably something that has a pour tip). Do no overheat. If using a microwave, stir every 30 seconds.

When above ingredients are melted, add the following optional ingredients:
1 tsp Vitamin E oil (helps preserving)
1-2 tsp flavor oil (peppermint? ...)(I don't use this as I love the coco butter taste as is!)

For SPF (which I've not done yet):
1/4-1/2 tsp micronized titanium dioxide 

Pour into the tubes connected to the tray. As the batch cools, it will coagulate & become difficult to pour. Simply place in the microwave for 10-15 seconds and then continue filling tubes. Fills approx 46 .15 oz lip balms.

Fifty tubes actually disappear rather quickly: purses, coat and vest pockets, differing rooms, vehicles, giftings - like my kids often ask for new ones.

Shared with: Spain In Iowa, Sustainable Eats, My Cultured Palate, Real Food Wednesday, Fat Tuesday, Slightly Indulgent Tuesday, Traditional Tuesday, Monday Mania, Homestead Barn Hop, Or So She Says, Six Sisters Stuff, Farm Girl Blog Fest, Food Renegade, Frugal Days, Dandelion House

July 24, 2011

Felted Soap or Soap in a Sweater!

"Soap in a Sweater" - felted soap
Felting over soap is SO easy. I've read and watched several tutorials. I'm going to tell you how I do it. You can use any soap. I've even done it using hotel soaps. But usually I use my homemade soap (which I posted a recipe for at my kitchen blog), primarily because that's the main soap around my house, since I've been making and using my homemade soap for probably twenty years now. Since the last soap I made was heart-shaped, that's what this tutorial will show.

wrap wool tightly around the soap
add some color variety if you want
 Wrap wool tightly around the soap, covering it totally. If you leave it too loose, it'll take longer to tighten/shrink around the soap, and you can end up with some wool flaps that are impossible to adhere to the already felted soap. Once wool is felted it won't accept anymore wool layering, unless you needle felt it (I tried this, but wouldn't want to do it too much to make the soap start crumbling - I am going to try needlefelting a little design first in some wool before starting the wrapping process sometime). Looseness can be worked more - I've done it, even after it's totally dry and I want it tighter around the soap.

put the wool wrapped soap in a plastic bag
Now put the wool wrapped soap into a sandwich bag. Here is where I differ from other tutorials - they put the soap carefully into the toe of a nylon sock, usually knotting it. Wet felting with kids, as well as teaching felting in a setting where water accessibility and dripping water isn't easy, taught me to use plastic bags. And who wants to unknot something. I just put some hot water in the baggy, twist it tightly around the soap, and start rubbing all around the soap. Most wet felting has you using hot soapy water, but here you've already got the soap. It'll get quite sudsy, which would rinse out easily with a nylon sock, but I just pull the soap out and rinse it and the plastic bag, then put the soap back in if it needs more felting. When I had the Valentine Tea crafting party, we just left the bags by the greenhouse sink and people coming to that craft station reused the bags.

after adding some hot water twist the bag tight and rub all around the soap
rinse the felted soap and let it dry
Total time for the process? Only about 5-10 minutes! And you've got a unique, creative, functional work of art.

February 18, 2011

One-Use-Soap? or Homemade "Wet Ones"

One-use-soap - craft felt dipped in melted glycerin
One of the craft stations at the Valentine Tea, was a supposed one-use-soap. I say supposed because I've been using them, and the glycerin soap is lasting longer than a one-use. I started out with larger craft felt shapes, but someone at the party decided smaller would be better and I totally agree. After the party, I cut out lots of smaller hearts, dipping in the melted glycerin, set to cool on a sheet of foil, and then put them in a tea cup in our guest bathroom.

You don't need to cut out hearts (a tutorial I found did snowflakes for a Christmas party). In the future, I'm just going to use a rotary cutter, cutting small rectangles from craft felt. I want to put some in small zip-lock bags for keeping in my purse. The one-time use? Could just put them back in the bag and use till no more soap, but throwing them away after one use wouldn't be such a bad thing.

One-use-soap process
My other question still to explore is the melting temp and quick dipping. If hotter, would less glycerin adhere to the felt? Or would just very quickly dipping be the answer. Do they need to be a one-use thing? Any way, they are a very cool idea!

Materials?
Glycerin chunks - I found them at Hobby Lobby - don't get the opaque kind, if you want to see thru to felt glitter or words you write.
Something to melt the glycerin in - Dawson had gotten me a small crock pot from a second-hand store that is now designated for this function.
Tongs for dipping in the hot glycerin
Foil to lay the hot dipped pieces on to cool and harden
Craft felt - cut in small pieces

As I wrote the above word "pieces" ... I got to thinking ... There's other things that could be dipped in the glycerin for this purpose too. Has anyone explored the options? I don't use dryer sheets anymore, but they could be cut smaller and "re-purposed"! What else? ...

February 17, 2011

Valentine Crafting Tea Party


I had a Tea Party open house. I set up craft stations all over my house. I'd sent out an Evite to a variety of people: some of them very old friends and some new. I think everyone attending knew someone, but people were conversing with lots of new people. I knew everyone! (Oh wait, no, someone brought a friend whom I did not know.)

Me in the tie-dye apron and friends
Valentine paper crafting station

The dining table was set up with the Valentine making paper station. Near it was a small table brought in from the guest room and set up with acrylic paints, glue, glitter, and sequins. Wool and homemade soap were in the greenhouse, off the dining room, for making felt covered soap. The guest room was set up as the needle felting station. The laundry room had a crayon melting craft possibility and a little crock of melted glycerin soap for a One-use-soap craft.

Felting over homemade soap station
Needlefelting craft station
Erika at the One-Use-Soap craft station
Sarah cut out the hearts and squares from my pullman loaves

I'd made the pullman loaf pan bread and all the tea sandwich makings, veggies and dips, the day before, but the morning of the tea I was making scones ... so they'd be fresh. So I didn't have my sandwiches assembled before the guests arrived. As a result, the kitchen and it's table became another craft station with my guests making the various tea sandwiches. I think they enjoyed this!

I had an electric pot with hot water and tea bag varieties, and then of course a wide variety of tea cups Monte and me got at second-hand stores. I just couldn't see people using disposable cups for a tea party! I posted a lot of the food recipes at my karey's kitchen blog (see sidebar).

Second-hand store tea cup finds

I didn't make desserts. Some people brought them. Dawson's girlfriend Splarah made beautiful cupcakes that were almost too pretty to eat!

Splarah's homemade cupcakes!
I'm going to post individual tutorials about some of the craft stations.

On the window sill by the front door I had Valentine gift bags for people to take their goodies home in. People are still telling me "thank you", and how good a time they had. I've decided this valentine crafting tea party will be a tradition.

Gift bags for taking home craft goodies

January 31, 2011

Homemade Valentine Soap

Homemade soap - paprika created the pink soap
I made homemade soap Saturday. It's supposed to sit in it's box for 24-48 hours, before cutting into shapes and cured for 2 weeks, at the least. I was thinking "Valentines" so cut heart shapes. The leftover scraps I roll in balls. Since the soap is uncured, it's still caustic, so I dump it out on a vinyl table cloth and use rubber gloves. I've let them cure on my baking cooling racks, or brown paper before - this time they're on some old wicker placemats. The soapmaking recipe is at my Karey's Kitchen blog.

Using a cookie cutter for the heart-shape - rolling scraps into soap balls
Some of these will get felted over in two weeks. I'll post pics then ... so keep tuned.

January 29, 2011

Homemade Soap and Moisturizing Cream

I made bar soap today. I'd rendered suet before and froze it. I've not done it for a long while, so I re-skimmed all my soap books to refresh my memory. I've not bought soap, since we like my homemade soap, having made and used it for over twenty years now.

I used department store boxes lined with stapled on plastic garbage bag plastic. I still have these in the garage, tho Monte made me nice wood boxes several years ago. I line these with freezer-wrap paper, waxed side up, of course - taping it to the edges. My boxes' inside dimensions are 11 1/2" x 18" and a couple inches deep.

Firstly, I put on my apron, glasses, and a mask, to make the lye - water mixture, as it heats to over 200 degrees and needs to cool. I use a recipe I have in my cookbook I got from Ann Bramson's Soap book from the 70's. I first measure my empty 1/2 gallon canning jar and add 32 oz (2#) water. Some years I've brewed herbs in this water hoping for their herbal properties in my soap. Then I stir in 12 oz lye (sodium hydroxide - ordered from online) using a silicone spatula. Little bits of lye will tingle with a burning sensation on your skin, if you get it on it. Just rinse it off. You don't want to breath this reaction, so ventilation is nice.

Measure your stainless steel 4 qt pan and add 38 oz tallow (palm oil is it's equivalent; shortening could be used too), then add 24 oz coconut oil and 24 oz olive oil (this time I did 20 oz and 4 oz castor oil - just because I wanted to!). Heat these till solids are not quite melted. It takes some time to cool down, and will continue melting while sitting.

You want the lye mixture and oil mixture to be about the same temperature around 95-98 degrees. I had to set the lye mixture outside to cool down. I put some cold water in the sink to cool the fats down some too, once the lye was down and ready. If the lye cools too much, sometimes just stirring it will raise the temp a bit. I put the pan in the sink (no need for water in the sink) for slowly pouring the lye mixture in. You want the lye water to pour slowly like a pencil width, stirring the fat continually at the same time, using a silicone spatula. Gently keep stirring for the lye and fats to chemically connect and do their thickening thing.


Keep stirring in circles and swirls gently for at least 10 minutes. Then you can occasionally stir it. This time it set up fast (some times it can be an hour or more), thickened enough that when dripped from the spatula it leaves a trace on the surface, leaving a trail a short bit. At this point is when additives like scent and coloring is added. I usually don't add these, liking the creamy color and tallow or palm oil are forever sweet smelling. If lard were used, or a poor quality beef fat, it develops an off smell over time, so scenting masks this. It's best to use essential oils rather than synthetic fragrances. Colorants I've used are things like cinnamon, cocoa, turmuric - this time in one of the soaps I added 5 tsp paprika.

I also added essential oils this time: 2 tsp lavender, 1 1/2 tsp rose geranium, 1 tsp rose oil, 1/2 tsp sage. Not like that's my favorite, but what I had that I thought might go together. Most bottles sold are typically a 3oz size. I found that's about 2 teaspoons worth. For this amount of recipe (about 8 pounds) it's suggested you use 4-5 teaspoons. I ended up adding to my shopping list now that I took stock of what I've got and what I want. For gift-giving and covering with felt, having scented soap is nice.

Once the mixture is thick enough with the tracing, pour it into the molds. Soap needs to sit covered with a blanket to keep warm, for about 24 
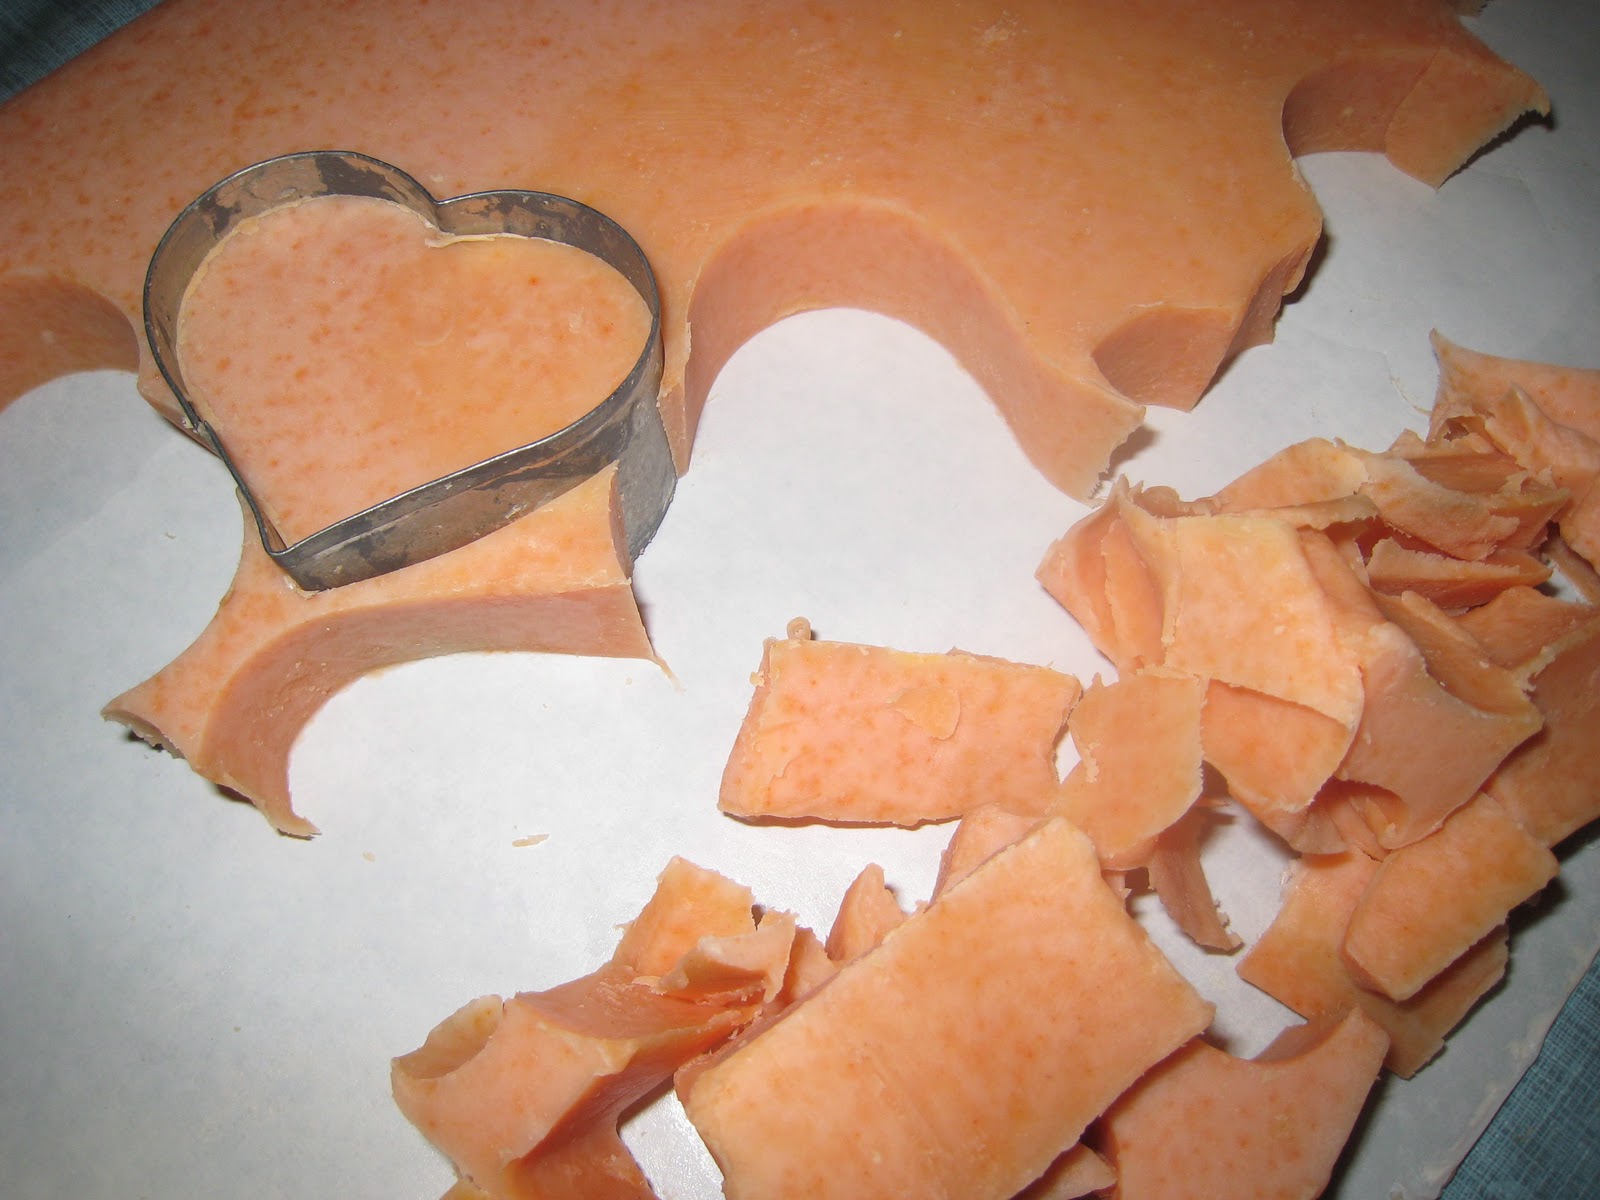
hours. Then I dump it out on a plastic table cloth. Using rubber gloves I'll cut it into bars or shapes. I'll post a pic of this tomorrow or the next. The soap then needs to sit on brown paper or stainless steel racks or wicker or rattan placemats to cure for 2-4 weeks. During this time the lye turns from a caustic ingredient, into an emollient mixture - the term is "saponification".


I have been making soap for years - now two decades! I guess that tells you we like using homemade soap. My very first books that started me down this journey were Jeanne Rose's Herbal Body Book and Soap by Ann Bramson. I see that both are still available from $1-100. Both were printed in the 70's. I refer to Jeanne's book as my "Hippie" book. It is so marked up with notes and about to fall apart. It's the best beginning reference for what oils, essential oils, fats, herbs, etc are good for - like nutritive values, for what skin types, hair, etc. I've collected other books over the years - the others I've most used are by Susan Miller Cavitch. Her books are still available too. The Natural Soap Book makes 12 pound batches. Her second, The Soapmaker's Companion, makes 5 pound batches. She uses a mixer - I don't. My cookbook has the basic recipes I make once a year.

Since I wrote my book, I've been making a shampoo soap bar and moisturizing lotion - both from The Soapmaker's Companion, 
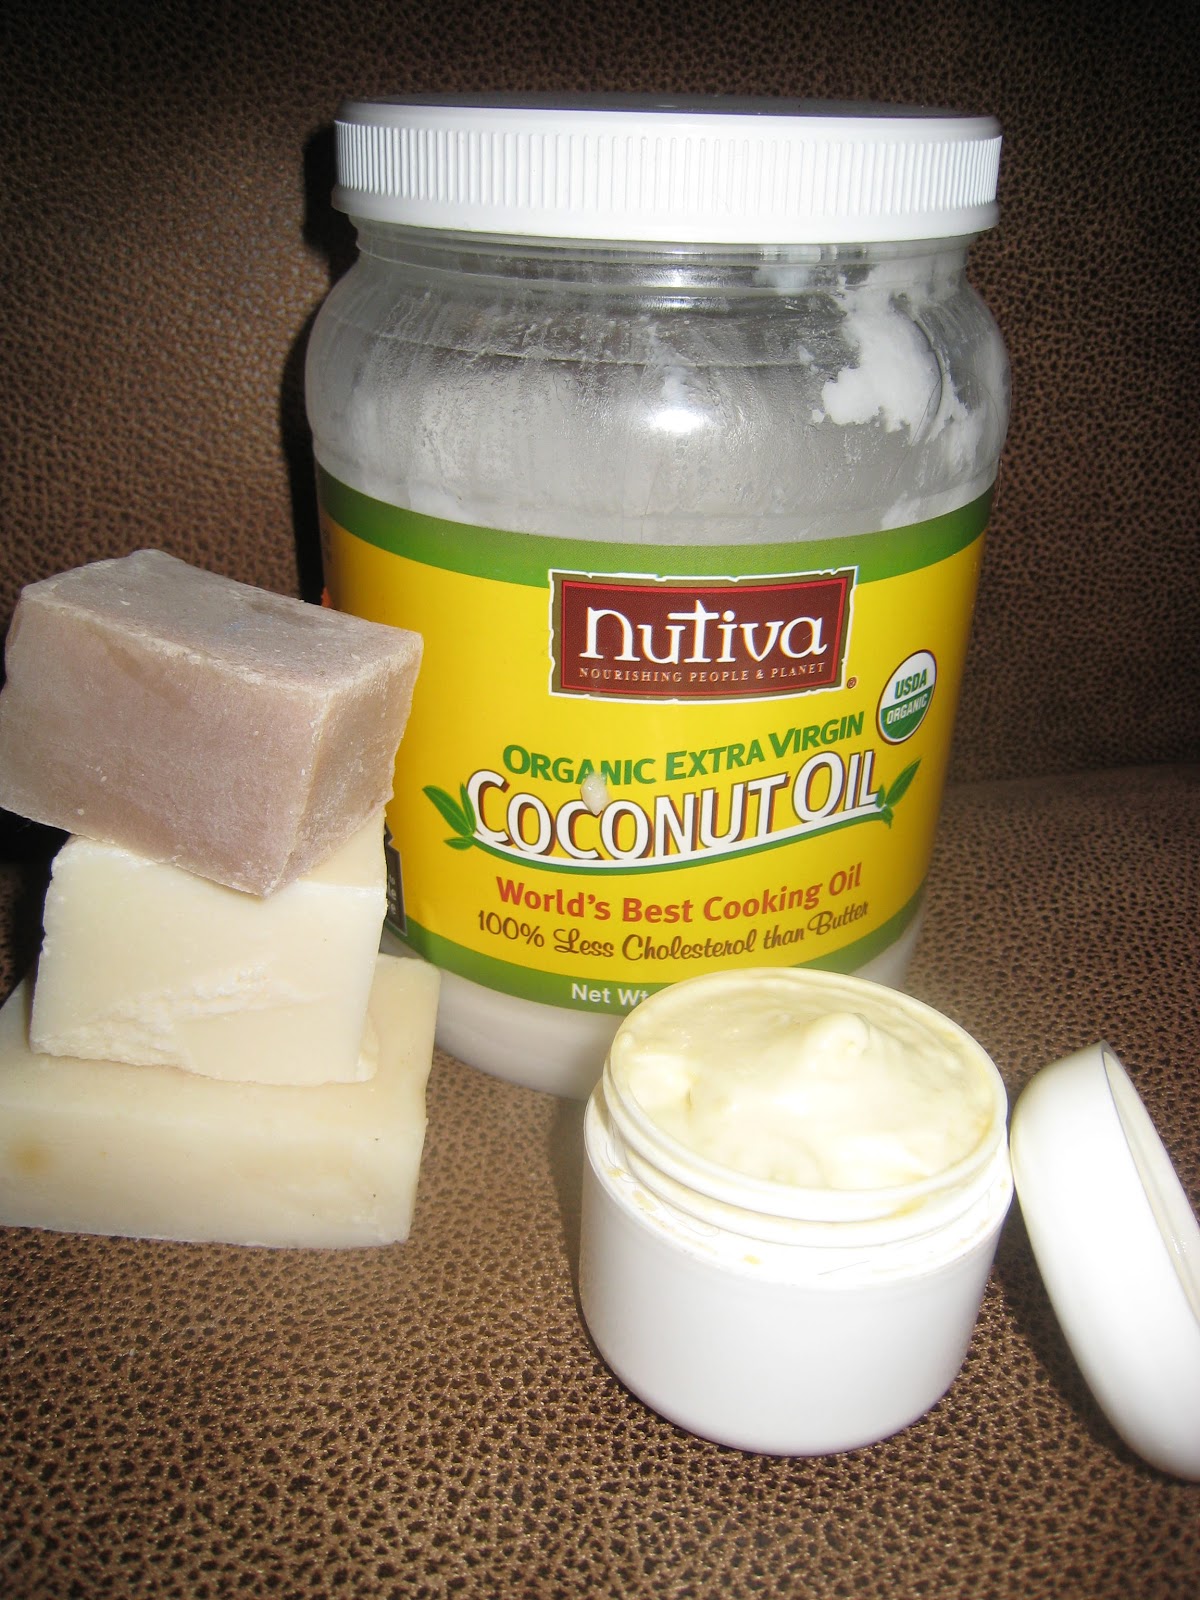
tho I've tweaked them quite a bit. In the picture to the right are the three main soap bars I keep stocked. If I don't give too much away, I only have to make soap once a year (even longer span now that it's mainly just Monte and me)(I'll have to ask my kids if they want homemade soap made for them) - that's our total soap use - no buying of bar soap, face soap and creams, nor shampoo! In the past I've done lip balms and laundry soap too and other household cleaning stuff - maybe I'll return to doing that. So pictured are a small tub of the face cream (moisturizing lotion), and stacked from bottom to top: body soap, face soap, and shampoo bar. Cold-pressed, unrefined, extra-virgin coconut oil is great for cooking, but also makes a wonderful massage oil, and Monte's been using it as his body lotion. It and my face cream initially feel greasy, but they soon soak in. I've tried so many facial products, including expensive ones, and still prefer my homemade ones!

The Moisturizing Cream I make is considered a firm mousse. The recipe proportions amount to about 140 grams of solid fats, 400 grams of liquid fats, and 400 grams of water. Each time I make it I use differing ingredients depending on supplies on hand. Olive oil is a dominant fat in all my soapmaking. The solidifiers in the cream are melted beeswax, cocoa and shea butters. I like castor oil in both the cream and my bar soaps. In the cream, I've used wheat germ oil, jojoba oil, apricot oil, and always almond oil. I don't use water - making it's proportion up with liquid lanolin, aloe vera gel, rosewater, and witch hazel. Then there's added glycerin, borax (helps in emulsifying the liquids and solids, so no separation), grapefruit seed extract for naturally preserving the mixture from spoilage (parabens are what's used in almost all cosmetics and studies are finding health issues from this chemical), and then I add some essential oils: lavender, peppermint, sometimes nutmeg, and always lemongrass essential oil. This fills 3 small tubs and a quart jar I keep in the fridge for refilling the tubs. This batch lasts me for more than a year!

I want to write out the recipe because I know a few people would read this and want to make it - I would. I don't want to overwhelm you, but I do keep these ingredients stocked in a bin in my linen/cleaning equipment closet. I used to order them from a co-op, but now purchase them from a health food store and online. Like, Google soap making, and you'll find many sources. Lye is a major bar soap ingredient. When mixed with coconut, palm, olive, castor, etc oils it saponifies into a rich healthy-for-the-skin soap - non-drying to the skin. Store-bought soaps have the natural by-product of glycerin extracted, for making other stuff, therefore removing the emollient quality.

MOISTURIZING CREAM
Melt the solids - I put them in a large glass bowl, and melt using the microwave (Cavitch does it in a saucepan on the stove, which I should do).

SOLIDS - 130-140 grams
100 gms beeswax (I used to grate it, but now found pellets)
20-25 gms each of cocoa butter and shea butter
Make sure the beeswax melts - I've occasionally found tiny bits when using my cream :-D

OILS - 395-400 grams
250 gms Olive Oil
50 gms Almond Oil
20 gms Castor Oil
25 gms Wheat Germ Oil
50 gms Jojoba Oil
The oils can be added to the melting solids. Don't heat above 165 degrees. Remember, you can use whatever you have on hand as long as you keep to the overall proportion. Like this time I didn't have wheat germ oil (it needs to be kept refrigerated, and I must have thought it too old awhile back ... and then didn't write it down on my 'to buy' list ...). Also, when I opened the jojoba oil, knowing it was getting old, I smelled it. I won't use rancid smelling products. So I only used more of the castor and almond oils this time.

WATER - 400 grams
primarily witch hazel and rosewater
then some liquid lanolin and aloe vera gel (I used about 100 grms of each this time)
Then 10 gms of borax
15 gms vegetable glycerin
5-10 gms grapefruit seed extract
Make sure the borax completely dissolves in the water mixture.

A freestanding mixer would be nice to use, but I've always used a hand-held little mixer. I might try my immersion blender sometime. Starting on low speed, slowly drizzle the water mixture into the oils. Continue mixing as the mixture thickens, occasionally scraping the sides and increasing the speed. Once it's thickened like mayonnaise and cooler, add essential oils - 5-6grams. I didn't weigh them this time, so used 1/4 tsp each of lavender and peppermint. I would have used nutmeg too, if I'd had it. Then 1/2 tsp of lemongrass.

I often add vitamin E. I used to add Vitamin A to this mixture too. Vitamin A, retinyl palmitate, is good for the skin, but new studies are finding that it might, with sun exposure, develop skin tumors. It's put in lots of lotions, including sunscreens because it is an antioxidant and slows skin aging, but with sun exposure, is it cancerous? On the subject of sunscreen, I read labels and try to avoid oxybenzone, which is hard, cuz it's in just about everything, including lip balms. It can be allergenic, but primarily it messes with hormones. Sunscreens too are messing with our Vitamin D absorption. I also don't use products that use mineral oil - robs skin of it's own natural moisturizing mechanism - it's used cuz it's cheap!, and don't use petrolatum products (in ChapStick and Vaseline). Europe won't allow usage of these products. Monte wants me to start making two moisturizing creams - one with the Vitamin A, for a night cream.

I still have lots of homemade soap bars in tubs from many years of soapmaking days with friends. Over the years we've tried all sorts of additives. I'm sensitive to fragrances, so rarely use them. When soap is made with lard, over time it develops an off smell, so fragrances mask this. I don't use lard, using tallow or palm oil for the other 'fat' in my bar soaps - forever has a sweet smell. We've added ingredients like oats, honey, and powdered milk; colorants like cinnamon, or turmeric ... I've brewed a strong herbal tea to use as the water, adding the herb properties to the soap as well as differing color.

I've started felting wool over these soaps. I'm posting a picture of some I did this year to go with, matching, some of my knitted washcloths. Think: "Soap in a Sweater"!

Felted Soap

Related Posts Plugin for WordPress, Blogger...